
The Elder Kiln
Requirements:
- 75 Magic (Boosts don't work)
- 60 Agility (Boosts don't work)
- 41 Mining
- Rune Pickaxe, Inferno Adze or Dragon Pickaxe
- Armour, weapons, potions, and food to defeat many powerful enemies
- Odischamp level 113 (mage)
- LolthenKILL level 113 (mage)
- FightpitPKer level 113 (range)
- Firecapezorz level 113 (melee)
- NoRemorse77 level 106 (melee)
- TzHaar-Ket (Hardened) level 320 (x2)
- TzHaar-Xil (Hardened) level 368 (x2)
- TzHaar-Ket-Yit'tal level 313
- Lava monster (Elder Kiln) level 198 (x12)
- TokTz-Ket-Dill level 100 (x3)
- Ket-Zek level 360 (x2)
- Yt-MejKot level 180
- TokHaar-Hur level 100 (x5)
- TokHaar-Xil level 140 (x8)
- TokHaar-Ket level 180 (x3)
- TokHaar-Mej level 160 (x7)
- TokHaar-Ket Champion level 357
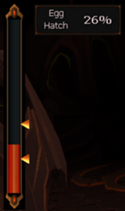
Hatching a lost egg The egg's temperature gauge. All combat in this quest takes place in safe areas, and no items will be lost apart from what you've consumed. However, dying will reset that area of combat, and you will have to start that fight again.
Speak to TzHaar-Mej-Jeh by the birthing pool, in the north-east part of TzHaar City. He will say that his egg is dying because it is too cold. The Mej have tried to save it, but they say it is beyond help. Mej-Jeh disagrees; he thinks that even though many eggs are being born different or dying, his egg is stronger and will be a great TzHaar. He asks you to help.
TzHaar-Mej-Ak and Mej-Jeh will help you to keep the egg within the optimum temperature for hatching. To do this, the TzHaar will provide runes so you may cast fire spells to heat it up and water spells to cool it down, keeping it between the two markers on the temperature gauge, which moves up and down as time passes. Runes are not needed; you don't even have to be on Standard spells, and no experience is gained. It is advisable to let the egg cool slightly, and only cast when it is too low, or the TzHaar-Mejs' fire attacks may push it too high. The markers on the gauge will move periodically. When the temperature is between the markers, the hatching percentage rises, and the percentage lowers when the temperature is outside the markers.
The egg is hatched. It should be noted that it is always easier to get the temperature up than down, as the TzHaar-Mejs could only use fire spells. Also, the space between the markers becomes smaller and smaller as the hatch percentage increases. If the hatch percentage reaches 0, you must start all over.
Despite your efforts, the egg hatches as Ga'al. TzHaar-Mej-Ak takes it away to join the others for the Fight Pit.
Restoring memories TzHaar-Mej-Jeh explains that Ga'al-Jeh has to die because he is useless without memories, and the TzHaar do not have any way to teach new skills. More and more eggs are dying or hatching as Ga'al, and it is becoming a problem for the race.
Mej-Jeh thinks he has a way to give the Ga'al their memories back, but he doesn't think the other Mej will approve. They think the TzHaar shouldn't go back there, but Mej-Jeh thinks it is the only way to save their racial memories. But he needs a Ga'al to test his theory on and he has chosen his son, Ga'al-Jeh.
You now need to get Ga'al-Jeh from the Main Plaza, west of the hatching pools. Talking to him shows that he is unwilling to leave when asked.
The Fight Pits Talk to TzHaar-Mej-Ak. He will tell you you will have to protect the Ga'al from death in the fight pits yourself if you want to rescue it. You will need to be prepared for a moderately hard fight involving all three styles of the combat triangle, against quite high levelled enemies. Note that you are allowed to bring familiars, but they can't have anything in their inventory. Thus, a good choice would be a healing familiar such as a unicorn stallion or a combat familiar such as a steel titan.
You will have to fight TzHaar-Ket-Yit'tal after all enemies are defeated, so a prayer potion may be required.
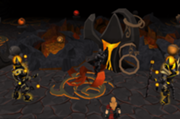
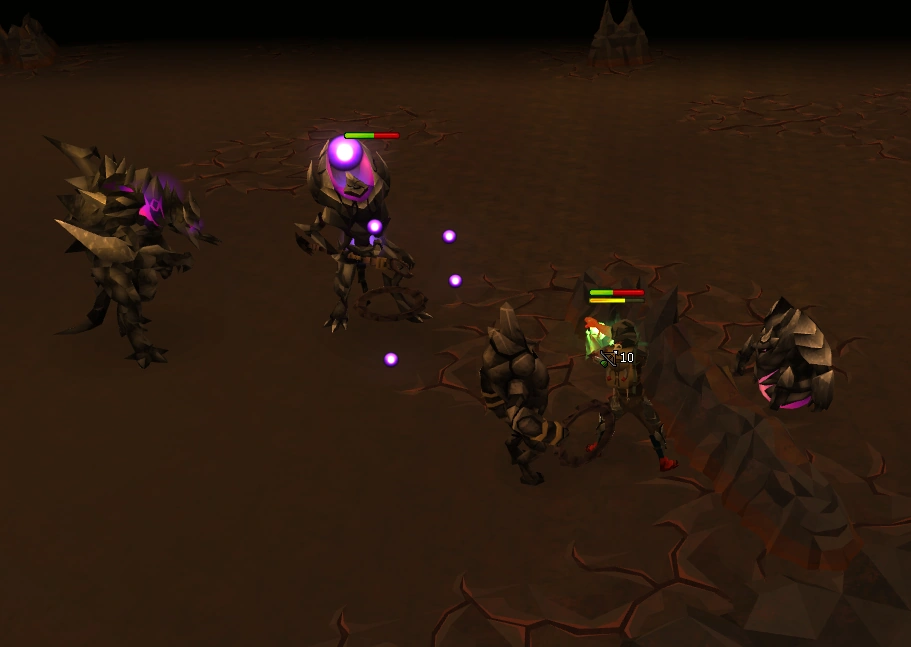
Protecting the Ga'al Ga'al-Jeh's health counter. At the start of the fight, the player spoofs are either fighting each other, one of the TzHaar in the area or Ga'al-Jeh. At the top-left corner of your screen you will see the remaining health of Jeh, which you need to keep as high as possible. When you attack a monster in the area, it will focus on you. You can use the centre of the area as safespot, and possibly trap the hardened TzHaar-Ket on top of Ga'al-Jeh to let him act as safespot against other melee enemies.
Protect prayers or deflect curses will fully block all damage from TzHaar and player spoofs alike. The TzHaar-Xil (Hardened) use two attack styles, ranged and a basic melee attack.
TzHaar-Mej-Ak observes the battle behind a hot vent door at the south-east corner of the arena, which also serves as the only exit. There is no penalty for letting Ga'al-Jeh die, you just have to try again. If you die, you respawn in the Main Plaza, lose no items and with stats fully recovered other than the notable exception for Special attack energy. Players might want to recharge it first before another attempt for best chance of victory.
Note: The following strategies always assume the player could kill the opponent in question in a timely fashion. Players should always prioritise those attacking Ga'al-Jeh.
Prayer switching methodEdit A good strategy is to take out Odischamp immediately, as he starts off attacking Ga'al-Jeh. Be sure to use Protect from Magic or Deflect Magic, since he can hit fairly high. Then, attack the west TzHaar-Xil, who will be either idle or ranging Ga'al-Jeh and attack him from a safespot with Protect from Missiles or Deflect Missiles. Meleeing at close range is trickier, and inexperienced players are strongly recommended against bringing combat summoning familiars, as this would make the Xils' attacks more unpredictable and harder to pray against; see TzHaar-Xil (Hardened) for more details. The TzHaar-Kets will be busy fighting each other, so ignore them for the time being. The south TzHaar-Xil is usually the next to kill its opponent, Firecapezorz. Don't attack it unless it starts attacking Ga'al-Jeh, as being attacked by two of the Xils is extremely dangerous. Deal the the south Xil in the same way, make use of safespots and avoid letting him attack you up close and pray ranged. Kill the remaining Ket if it starts attacking Ga'al-Jeh.
NoRemorse77 will start attacking the Ga'al, so attract her attention as well. LolthenKILL and FightpitPKer's battle should be over soon afterwards, and whoever won will be at low health, so use the appropriate prayer and finish them off. NoRemorse77 won't be a problem, since she apparently lost her claws before the beginning of the Fight Pit. Make sure to keep an eye on the remaining TzHaar-Ket, as it can easily kill the Ga'al if not focused on you.
Tanking method 80 defence is recommended for this method. A method to win this fight is to take extremely highly defensive armor and pray protect / deflect magic. Overload would be useful, but it is best to drink it before you start fighting. Use a barrows helmet (preferably Verac's helmet for the prayer bonus), a barrows body (Torag's body, Guthan's body, and Dharok's body all have the highest defensive stats), a barrows leg armor (preferrably Verac's plateskirt for the prayer bonus), an amulet of fury, dragon boots or steadfast boots, a chaotic weapon, an obsidian cape or skillcape or fire cape, and a dragonfire shield or chaotic kiteshield. These give you 380+ melee and ranged defence bonus, which is the minimum necessary to tank the various monsters. Torva armour gives a valuable maximum life point boost, and 480+ defence bonus against melee and ranged is possible. Using this method, immediately kill Odischamp while praying protect / deflect magic. Chances are, both TzHaar-Xil (Hardened)s will then kill their respective opponents and attack Ga'al-Jeh. Switch your prayer to protect / deflect range and attack them both once to attract their attention. They will virtually never hit with their melee attacks, so you can kill them at your leisure. Simply attack whatever is attacking the Ga'al and eat when needed.
Note: If player dies or if Ga'al is killed, then progress in the Fight Pits is reset. Talk to TzHaar-Mej-Ak to restart to kill all the fighters again.
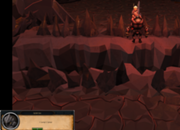
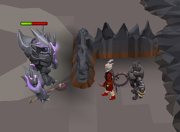
The TzHaar Champion A safespot against the TzHaar-Ket-Yit'tal. After killing all the enemies in the Fight Pits, TzHaar-Mej-Jeh and TzHaar-Mej-Ak will have a short conversation, and Mej-Ak will call TzHaar-Ket-Yit'tal, the TzHaar champion, to kill the Ga'al. He uses melee only, so if you have enough prayer left, you can just use protect from melee or deflect melee and fight him until he dies. The TzHaar Champion will also begin attacking you immedately, so Melee Protect as your quick prayer option is recommended. The TzHaar Champion can drain your prayer when attacking you. As the champion only uses melee, you can safe-spot if using a halberd, magic or ranged. Stand between the pillar in the middle, and Ga'al.
TzHaar-Ket-Yit'tal has an extremely high defence against ranged attacks, and magic attacks will also splash often. A dragon halberd would be far more effective. However, if making use of safespots, this is fairly irrelevant as long as the player has enough time.
This fight should be very easy if using a safespot or praying with enough prayer potions.
NOTE: If you die during the fight with the TzHaar Champion you won't have to do the pits again, you will only have to kill the champion.
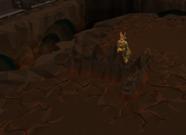
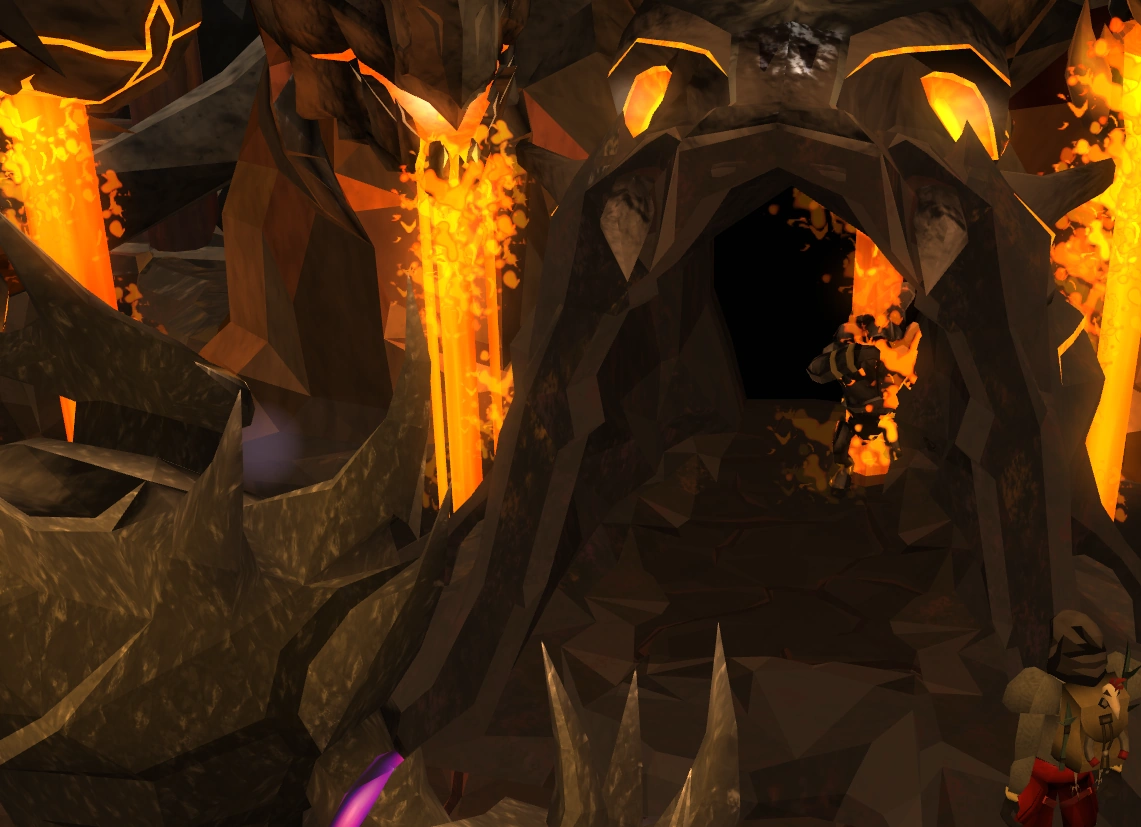
To the Kiln After the fights, talk to one of the TzHaar-Mejs. After a conversation about how Mej-Jeh wants to transfer the TzHaar's memories using TokKul, he will send you to the Kiln to transfer the memories from Ket-YitTal's TokKul to Ga'al-Xox.
The Kiln can be found to the east of the Main Plaza. The TzHaar-Ket at the entrance will give you access to your bank, allowing for quick restocking of supplies after clearing each checkpoint.
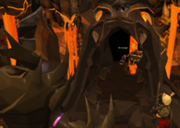
Proceed to the Kiln and try to enter the cave, where the guard will warn you that he can hear some Ket-Zek in the cave, so be sure to carry some prayer potions and either a rune or dragon pickaxe or the inferno adze. Additionally, it is advisable to bring a ranged weapon and ammunition whilst proceeding through this section to defeat the Ket-Zek with ease. Note that you will not be permitted to bring a summoning familiar into the Kiln.
Ga'al-Xox learns to jump.After entering, you will encounter a short cut scene in which Ga'al-Xox will stop following after you jump a narrow chasm. You will tell Ga'al-Xox how to venture across and it will continue to follow you. Praying protect/Deflect Magic throughout your journey in these caves is highly recommended as even with high magic absorption, you will suffer devastating hits. All monsters in these caves have attacks that can easily hit for over 200 life points unless proper protection prayers are used. Some monsters even possess the ability to hit through prayer, although only in low amounts.
NOTE: This area is safe and you will keep all your items when you die.
Strategy note: After completing a room, to restore life points, Prayer and other stats or to go to bank, going to the next room and dying on purpose will return you to the entrance quickly. Entering the cave again returns you to the room you left.
Room 1 Fighting two Ket-Zek. As you proceed you will encounter 3 lava monsters and the TokTz-Ket-Dill. You can use Protect From Magic to nullify the attacks from the lava monsters, but to fight TokTz-Ket-Dill you will have to initially fight with your pickaxe to penetrate its armour - it will occasionally stomp incurring unavoidable damage throughout the fight. If you have Protect Melee/Deflect Melee activated, the TokTz-Ket-Dill will use it's stomp attack frequently, inflicting upwards of 200 damage every time.
Once you have cleared all these monsters, you can proceed into the next room. Before doing so, investigate the skeleton by the end of the cavern to receive the journal of Perjour, which is needed later.
Room 2 In the next cavern, you’ll find some Tokkul, pick it up. You will encounter two Ket-Zek and more lava monsters. If you have deflect magic and do not want to fight the Ket-Zeks, turn on deflect magic and draw fire from the Ket-Zeks. This will kill them slowly but effectively. These will have to be beaten before you can proceed into the next room. Also note if you have dreadnips they can be used to kill the Ket-Zek but you must attack them once in a while then step out of their melee range.
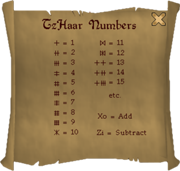
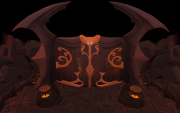
Room 3 Tzhaar numbers for Ancient Scales calculation. The huge ancient gate The next room contains four more lava monsters and a TokTz-Ket-Dill.
After defeating the monsters in this cave, you will come across a giant door and some ancient scales, this is where the journal of Perjour comes very handy. Refer to the note in the journal to decode the messages that the ancient scales read. The amount specified is shown in the TzHaar language, an example being: 7 + 16 - 4 - 3 (right) and 5 - 3 + 2 + 7 (left), making 16 on the right and 11 on the left. It is different for every player. If the incorrect amount of Tokkul is placed on the scales the player will be hit for 300 of damage.
Note the difference between vertical and horizontal lines, for example 2 and 4 and 3 and 6 . They are often mistaken for each other.
Once the correct amounts of Tokkul have been placed on each scale, the ancient door will open.
Room 4 Again you will have to jump over chasms. Follow the map and you will eventually come across another TokTz-Ket-Dill. Follow the road and jump over the next few chasms and enter the Cave Entrance.
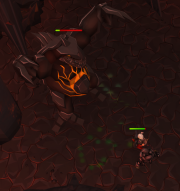
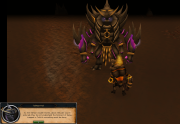
Room 5 Showdown against a Yt-MejKot. Upon entering the next room, you will be confronted by a Yt-MejKot and three more lava monsters, use Protect from Magic/Deflect whilst chipping away the Mejkot's health and then worry about the lava monsters. There is a safe spot for ranging/mage just east of the room entrance.
In the Kiln Before starting this fight make sure that Ket-Yit'tal's TokKul is in your inventory. If you forget the TokKul then you can complete the 7 waves, go to the bank and you will not have to complete the 7 waves again.
When you finally enter the kiln itself, you will have a brief conversation, then you will be attacked by seven waves of creatures, in a manner similar to the Fight Caves. This fight, like the caves, is safe; however it is still the most difficult part of the quest.
Note: If you leave the caves, your progress in this fight is reset.
The Kiln waves contain five kinds of monsters:
- TokHaar-Hur (Level 100) - Melee - weak against Magic and Crush
- TokHaar-Ket (180) - Melee - weak against Magic and Stab
- TokHaar-Xil (140) - Ranged - weak against Crush
- TokHaar-Mej (160) - Magic, but will hit melee at close range - weak against Ranged
- TokHaar-Ket Champion (357) - Melee, will periodically drain prayer points
- 2 TokHaar-Hur, 1 TokHaar-Xil
- 1 TokHaar-Ket, 1 TokHaar-Xil, 1 TokHaar-Mej
- 2 TokHaar-Xil, 1 TokHaar-Mej
- 2 TokHaar-Hur, 1 TokHaar-Xil, 1 TokHaar-Mej
- 1 TokHaar-Hur, 1 TokHaar-Ket, 1 TokHaar-Xil, 1 TokHaar-Mej
- 1 TokHaar-Ket, 1 TokHaar-Xil, 2 TokHaar-Mej
- 1 TokHaar-Xil, 1 TokHaar-Mej, 1 TokHaar-Ket Champion
The general approach to these 7 waves are:
- Pray magic
- Trap melee
- Kill mage
- Pray range
- Kill range
- Pray melee
- Kill melee
- Repeat
Suggested Setup
Slot Equipment Body/legs Torva armour > Bandos armour > Guthan's set > Verac Armour
Weapon Chaotic weapons > Abyssal vine whip > Korasi's sword > Brackish blade > Abyssal whip
Shield Divine spirit shield > Elysian spirit shield > Chaotic kiteshield > Dragon defender > Dragonfire shield >
Other Spirit shields
Helmet Torva full helm > Verac's helm > Helm of neitiznot > Ganodermic visor
Boots Steadfast boots > Dragon boots > Bandos boots
Gloves Goliath gloves > Culinaromancer's gloves 10 > Culinaromancer's gloves 9 > Regen bracelet > Combat bracelet Ring Onyx/dragonstone Imbued rings > Fremennik rings > Explorer ring
Amulet Amulet of fury > Amulet of glory > Berserker necklace (if using obsidian weapons)
Cape Max cape > Soul Wars cape > Fire cape > Ardougne cloak 3/4 > Cape of Accomplishment (t) > Cape of Accomplishment/Obsidian cape
Aura Penance > Reverence > Vampirism > Ancestor spirits > Inspiration > Regeneration
Ammunition Diamond bolts (e) > Broad bolts (if using a crossbow)
Suggested inventory
- Ket-YitTal's TokKul (required)
- Overload > Extreme set > Super set
- 3 prayer potions (prayer flasks for lower levels)
- Zaryte bow > Crystal bow > Chaotic crossbow > Rune crossbow
- Expensive spices
Optionally:
- Soul Split and/or Berserker Ancient Curses.
- Penance aura; the combination of Soul Split and Penance together allow for healing during combat while regaining the prayer points spent praying.
- Piety prayer or Turmoil curse; using these to boost your stats in fights against the tougher monsters can help kill them more quickly. Chivarly is useful for players who don't have 70+ prayer or defence.
- Dreadnip, a reward from the Dominion Tower, can potentially inflict substantial typeless and poison damage while also freezing its opponent in place.
- A powerful Special attack weapon, such as dragon claws or dragon dagger to dispose of dangerous opponents quickly, or alternatively, Enhanced Excalibur (preferably Elite) for healing from the special attack energy.
- A dragon halberd for safespotting melee monsters and/or the boss.
- The stock (the long part of the "T") blocks ranged, magic, and melee attacksUsing a safespot against the monsters in the Kiln.
- The cross of the "T" can't be walked across, but can be ranged, maged, or halberded across, blocking melee monsters so you can pray against ranged or magic.
- The cross of the "T" allows easy trapping of monsters on the opposite side of the stock.
- Its location, near the north-west, makes it unlikely that monsters will spawn north or west of the barrier, meaning it is highly likely that no melee monster will be able to breach the barrier and get at you unless you lure Looking at a player protected by the barrier and corners of the fighting arena.them in, you won't easily attract the attention of a ranger or mage, and if you do easily attract the attention of a ranger or mage they'll likely be trapped across the stock from you until you are ready to deal with them.
- No melee prayer is necessary unless you have extraordinarily bad luck.
- You can easily attack monsters trapped south of the "T" without getting in melee range because of the northern tip of the cross, or, alternatively, run up and melee attack a trapped monster for one strike then run back down. Use of this barrier to ensure you are only facing once combat style at a time and a generous supply of prayer potions or flasks will make the waves extremely easy. Rangers and mages can treat the Champion as any other melee and attack it from across the low wall portion of the "T" barrier. Unless a halberd has been brought, melees should remember that the Champion can drain prayer; also, the Champion is extremely resistant to ranged and magic, but not immune.
- When you finish your last kill for the 6th wave, the Champion will likely spawn beside you. It would be good if you are NOT in the safe spot at that time (as in the picture above) so that you WILL have a safe spot for the rest of the wave. The champion will then be unable to attack you or drain your prayer.
- The waves do not vary from player to player, so check the guide to determine what combat styles you haven't yet defeated in your current round before you go searching the combat area for them (so you can pray against that type).
- Mages have a powerful melee attack; to avoid this when meleeing, attack once and walk away.
- The area is quite large, and opponents spawn in it spaced fairly far apart. As a new wave starts, deal with the attacking opponents first, and try to lure the others to you one by one. Keep melee opponents stuck and dealt with them last with a ranged weapon, to preserve prayer points and food. It is actually recommended that you range them in melee armour, as this negates the trouble to switch back, have a higher melee defence which would be helpful if you mess up safespotting them and time spent dealing with meleers is generally not too much of a concern. Players short on life points could also trap a melee opponent and heal naturally, preferrably with the rapid heal/rapid renewal prayer, regen bracelet while resting.
- Ga'al-Xox would fight the opponents with his Toktz-xil-ul, but he cannot deal much damage and would only attack when the player is in combat.
- A dragon halberd would be an good weapon to have in order to avoid melee damage. It has a special attack that hits twice on large monsters (anything except TokHaar-Hur in this fight) and is especially effective against the champion.
Decision The Ga'al talks with the Tok-Haar. After you have spoken to TokHaar-Hok, you will need to run back out of the caves. Along the way, the Ga'al will talk to you about the new memories. TokHaar monsters appear from the caves, thirsty for more battle, and you have to flee from them. If you are killed while running through the caves you do NOT have to redo the battle.
After you leave the caverns, the Ga'al will ask you to meet it in the Main Plaza. Go to the main plaza and speak to either TzHaar-Mej-Jeh or TzHaar-Mej-Ak to enter a cutscene. The Ga'al will be asked to prove he has the memories, by defeating a TzHaar-Ket (Hardened). After he does, he will explain that being turned into Tokkul is torture and more Ga'al can't be infused with memories.
No matter what the player says, the TzHaar will ignore Ga'al's warning. Ga'al will return to the Kiln and report what has happened to TokHaar-Hok


