
While Guthix Sleeps
Start: Speak to Radimus Erkle in the Legends' Guild
Skills: 23 Summoning, 55 Hunter, 60 Thieving, 65 Defense, 65 Farming, 65 Herblore, 75 Magic, be eligible for the Warrior's Guild.
Quests: Defender of Varrock, Dream Mentor, Hand in the Sand, King's Ransom, Legends' Quest, Mourning's Ends Part II, The Path of Glouphrie, Recipe for Disaster, Summer's End, Swan Song, Tears of Guthix, Zogre Flesh Eaters. You must also have 270 Quest Points and killed Bork in the Chaos Tunnels.
What you need: Logs, knife, 5000gp or Ring of Charos(a), Air, Earth, Water, Fire or Mind Rune, Snapdragon Seed, Lantern Lens, Pink Dye, Seed Dibber, Papyrus, Charcoal, Astral Runes, Cosmic Rune, 3 Air Runes, Iron Chainbody, Bronze Med Helm, Unpowered Orb, Runes to charge an Orb, Law Rune, Death Rune, Sapphire Lantern, Weapons for two combat styles to kill a level 454 monster that can attack from all corners of the combat triangle
Helpful Items: Food, Teleports to various locations, Prayer and Super Restore Potions, Armour
NOTE: This Quest is very long and has a deep storyline, so it is worth paying at least some attention to what the characters say - it could be interesting!
Getting Started
Head to Radimus Erkle in the Legends' Guild and talk to him.
He will explain that a lady from Taverley is organizing a mission to Karamja to set up a place of worship for the followers of Guthix. He will tell you to go and find Ivy Sophista in the long building opposite the Witch's House in Taverley. You will also be given a pass phrase that you should use when initially talking to her so that she knows who you were sent by.
Head to Ivy and talk to her. She will tell you that since there are Lucien's spies all over, you will need to talk to Thaerisk upstairs.
Thaerisk will explain that the Karamja trip is a cover story and there have been some horrible murders in Taverley. He organizes a group called 'Crux Eqal' which helps to fight evil - something that the elder druids are reluctant to do. They have information that Lucien has the Staff of Armadyl, the same object that gave Zamorak Godhood. Two level 38 Assassins will arrive, so you should kill them.
Talk to Thaerisk again once the assassins are killed and he will explain that the Temple Knights, Crux Eqal and the Guardians of Armadyl are recruiting to get more people to help fight evil. There have been lots of spies seen in Draynor Village recently, with a stranger, Movario, entering Lumbridge Caves at the same time as their arrival. Your task is to find out about Movario and collect proof of his research.
The Hunt for Movario
Head to Varrock Castle Library and speak to Reldo. He will tell you some information about Movario when questioned, letting you know that he has a Khazard accent and reads books about Traps, Housing Improvements and Divination, especially if they are very old. Asking where to find him, he will tell you to find a Jungle Tracking Expert who is more skilled than himself in the art of tracking. With some Logs, a Knife, 5000gp or a Ring of Charos(a), Elemental Runes and a Mind Rune, head to the Jungle Hunter area south of the Feldip Hills and speak to the Hunting Expert who you buy the skillcape from.
She will explain that the Broav has a good sense of smell and would be great for the job. It can be caught using a Deadfall trap in a special pit to the west, then baited with Mort Myre Fungi, which you will be given. Unlike normal Deadfall traps, you do not need to jump over it and the bait will be enough.
Set the trap with Logs and a Knife, then use the bait with it. A Broav should now come and fall into the trap, letting you dismantle the Collapsed Trap and get an Unconscious Broav. Take this back to the Hunting Expert and she will train it while you contemplate complex theological problems. To track successfully, you will need an item of Moravio's.
Head north to the Khazard Arena and into the building on the western side with the Launderer within. He is very concerned about losing money, so to get information from him, you will need to either give him 5000gp or charm him by wearing a Ring of Charos(a).
Upon giving him the money, you will obtain some Dirty Laundry that belongs to Movario. Drop the Broav and use the clothes on it. Repeatedly doing this, and following the direction in which it goes, while navigating around buildings or bridges which get in the way, will lead you to a building with a Crumbled Wall which can be climbed over. Once inside the building, the Broav will make its way to the Broken Table and sound excited, so it's something that you should search.
Movario's Base
Underneath the table is a trapdoor, so open it and climb inside, ensuring that your weight is over 0kg - if it isn't, certain doors within the base will not open. It is a multi-combat area with a number of level 95 Elite Khazard Guards, so follow the passage north until you reach some stairs that head down into an area that you are unable to teleport out of.
You will find a door that reads 'Further Access Prohibited' when searched that is the first of several traps. Looking at the text, see which letter in the message is the same as a symbol in the top row.
Symbols & Runes Symbol Rune Air Earth Mind Water Having seen which symbol is in the message, use the corresponding Rune on the door - if you get it wrong, you will be hit 25 damage. Having used the Rune on the door, choose to Search it before opening since failure to do so will hit 35 damage, summon 3 Guards and give you a poison that hits 6 damage. If you leave the base, this will reset and you will have to do it again.
Passing through the door, you will come to a room with Bookcases in and a Gate that will hit 33 damage if you attempt to open it. On the floor between the Bookcases are wires, one of which will be glowing - information that can be gathered by sight or examining the Floor Wires. Once you have discovered which wire is glowing, Search the Bookcase at one end of it. See where the glow moves to and Search the Bookcase at the other end. Doing this should yield a message saying 'CLICK!' to appear in our chatbox. If the glow goes from a central Bookcase to the fence, pull the lever in the Bookcase. Keep repeating this pulling of levers and getting 'CLICK!' messages at the end of the glow until all the wires light up.
The door should no longer be electrified, so pass through it and search the Staircase for traps before climbing up it. This room and the door leading into it will not have to be completed again having got this far.
Within the office that you reach, search the Desk to find Movario's Notes (volume 1). Next to the Desk is a Waste-paper basket which you should pick up and search. Do not try and take the Treasure since it is fake and you will get hit 50 damage if you do so.
Upon searching the basket, you will find a Ruby Key inside. One of the Bookcases on the western wall should be searched to discover a small hole with a red gem above before using the Ruby Key on it to make a set of stairs appear from the floor. Head up the stairs and Search the Bed to disable the trap.
This will unveil a Chest which you should use the Ruby Key on to unlock, keeping up the idea of searching everything. Looking inside, you will find Movario's Notes (volume 2), Strange Key Loop and Strange Key Teeth. Head back down the stairs and there will be a door that you could leave through.
Unfortunately, it is probably stuck if you try to open it. Head back down to the room with wires on the floor and search the painting on the east wall to move it. Climb into the newly revealed room and check the thermometer as well as the weight that you are carrying. Pick up weights from the pile that equal the difference between these numbers and head back upstairs. Use the weights on the statue with a book on its back and you should be able to exit through the door.
If you fail opening the door three times, you will go through the door, trigger a trap and find yourself in a prison cell having taken 15-20 damage from the trap. You will also have lost any items that you had picked up within the Base, so will have have to Picklock the cell to get out and make your way back to where you found the items. Once you are out of the teleport-free zone without having set off a trap, make your way back to Thaerisk with the Books you have collected.
Finding Lucien, One Step at a Time
He will explain that information needs to be gathered about Lucien's location so you should go and see the Guardians of Armadyl at the McGrubor's Wood entrance to their base, then return to him at the White Knight's Castle with information that you gather.
With some sort of weapon at hand, head north of McGrubor's Wood towards the building and you will walk into a cut-scene in which two level 88 Mercenary Axemen and a Mercenary Mage have taken it upon themselves to attack some poor Guardians of Armadyl who are around level 45. Help the Guardians kill the Mercenaries, then speak to the Wounded Guardian on the floor.
He will tell you to speak to Idria in the form of a riddle. Head to the Pub in Seers' Village (the Forester's Arms) and go upstairs to find Idria. She will explain how Lucien wants to do like Zamouregal attempted to do in Varrock, but to the whole of RuneScape and to get to him, you need to work your way up the food chain by capturing a spy in Draynor Village without anybody noticing.
Head to Sir Tiffy Cashien in Falador Park and tell him about what needs doing. He will refer you to Akrisae Kolluym in the White Knight's Castle near the cell and circular table on the ground floor. Talking to Akrisae will get you a Teleorb which you will need to plant on a spy in Draynor Village. If you ask him how to get there, he will offer a free Teleport.
Once in Draynor Village, find a Shady Stranger and use the Teleorb with them, then make your way back to Falador with 20gp and a Lantern Lens as well as either 28,875gp or a Snapdragon Seed.
Talk to Akrisae and there will be a cut-scene in which the Spy is teleported into the cage and a Druid comes into the cage with a Super Truth Serum to give. The Spy will punch the Druid who clumsily drops the Truth Serum, breaking it. As always, it will be your job to make a new one. Talk to Thaerisk and he will tell you how to make the Super Truth Serum.
If you do not have a Snapdragon Seed, you will be able to buy one from Thaerisk at this point as well as asking him for a Teleport to Port Sarim. Head to the Magic Shop and talk to Betty who will take the Seed and put it on the counter as well as giving you a normal Truth Serum and telling you that to enrich it you should filter light from the door onto it through a Rose Tinted Lens.
Buy some Pink Dye from her for 20gp and use it with the Lens to get a Rose Tinted Lens, then use it on the counter and direct the light from the door onto the Seed.
Search the counter and you will have an Enriched Snapdragon Seed. Head back to Falador and talk to Thaerisk who will tell you that the Seed needs growing in a special patch on the roof of the western tower of the castle. With a Seed Dibber, head up to the top of the tower and plant the Seed in the patch.
Recruitment and Information
Head back down and speak to Idria who will tell you that a group of elite individuals needs assembling to help try and stop Lucien, although little effort will be required. You will need to speak to:
Use the Enriched Snapdragon with the Truth Serum to get a Super Truth Serum, then head into the cell with the Spy in. Use the Serum on the Spy and persuade them to drink it by choosing one of the options that is given to you, the correct answer varying from player to player - if you get it wrong, just try again. He will tell you that he works for Dark Squall, giving you a description of the looks.
Talk to Thaerisk and he will tell you that a portrait is needed. With some Charcoal and Papyrus, talk to the Spy again to get a Suspect Sketch.
Talk to Idria to give her the sketch to put up so that people can inform of sightings. She will also give you another four people who need recruiting.
Having recruited all of the required people, head to Akrisae who will explain how Silif had gone to scout the Black Knight's Fortress where Dark Squall was seen going in. It is suspected that Silif followed, so you need to go and have a look.
With an Unpowered Orb, Charge Orb Spells, Bronze Med Helm, Iron Chainbody, weapons for two combat styles, some normal armor and possibly a Prayer Potion, head to the Black Knights Fortress. Enter the Fortress and pass through the wall opposite the entrance. Climb down the ladder and you will find a room with a Tile in the floor that you should cast the Orb charging spell on.
This will turn the Tile into a Trapdoor that you can pass through to enter a multi-combat tunnel full of high level aggressive monsters. Head north, then follow the path east until you reach an area with just one level 138 Elite Black Knight. It will use Prayer against the attack that you are using, switching to the correct one after you have made several attacks. After 50 seconds, its Prayer will run out so it is possible to kill even if you only brought weapons to attack in one combat style.
Kill it three times to obtain Elite Black Platelegs, Platebody and Full Helm. Equip it and other monsters within the dungeon will stop attacking you. If you die and lose the Armour, you will be unable to reobtain it via the listed methods and will need to buy it from another player. Head west and jump over the Broken Bridge, making your way north and following the eastern fork when the path splits. Climb up the wall and keep following the path north round a set of Barricades until it heads east to a group of cells, one of which contains Silif.
Talk to Silif and he will say he feels weak. Head back west the way you came until the path splits several ways with a number of Doors. Wearing your Elite Black Armour, head through the northern door. Search the Desks, Wardrobes and the Key rack on the northern wall to get some more Elite Black Armour, Dagon'hai Robes, a Lobster, a Restore Potion (4), a Strange Teleorb and a Cell Key - all items that you will need. In the eastern part of the room is Dark Squall, who should be spied on so you can overhear a conversation he has.
Head back to Silif and open the Cell with the Key. Use the Food and Restore Potion on him to give him energy, then the Elite Black Armour to make him blend in as you have managed to. Talk to him and he will explain how you need to infiltrate the base (you cannot have a familiar Summoned since it would make you stand out too much!). Head out of the cage and back to Dark Squall's room with Silif following. Stand next to the maps on the south wall and talk to him to be given a Teleorb that needs to be put on Dark Squall while he studies the maps, then to head back to Falador.
Make your way across the room and use the Teleorb with Dark Squall, only to get noticed doing so.
He will reveal that he is actually Surok Magis before getting all the guards in the room to attack you, so it is worth making a fairly quick Teleport out to Falador.
Hazelmere's Prophecy
With a Law and Death Rune as well as the Dagon'hai Robes and Strange Teleorb, talk to Akrisae who will explain that the heroes are on the western edge of the Wilderness to find Lucien's base. Making sure you have the needed items - Runes, Robes and Strange Teleorb - enter the cage and say that you are ready and you will be switched with Surok and Teleported back to his hideout, while he gets locked in the cage (which has a Teleblock on to stop him escaping).
Climb up the nearby ladder and stand in the middle of the room, which has a Death and Law Rune on the wall. Activate the Strange Teleorb and you will find yourself in an icy location which is clearly related to Lucien. Head north up the eastern path and climb up the ice wall before jumping to the Ledge on the roof of the Chapel. Run east to the other side of the building and an exciting cut-scene will play.
Lucien will summon a number of creatures in a 'recruiting event' before the eight heroes, all of which are level 197, Teleport in.
A rather one-sided battle will ensue, with all the heroes fighting bravely, with losses occurring as Lucien turns them into smoke one by one. Thankfully, there are survivors who manage to escape.
Lucien will notice you are there and set the Guards on you. Make your way back to the ice area so that you are out of the Wilderness and can teleport away back to Falador.
Chasm of Tears
Talk to Idria and she will inform you that the bravery of the lost warriors will be remembered and statues have been put round the lake in Falador Park in memory of them. During this time, Movario has moved into Lumbridge Caves looking for the Fist of Guthix, so it's your job to go to him and pretend you are Surok.
Switch the Lens in a Bullseye Lantern to get a Sapphire Lantern, light it and head towards the Tears of Guthix Mini-Game while wearing the Dagon'hai Robes. Talk to Movario, saying that you are Surok and were sent by Lucien. He will tell you that he thinks the Stone of Jas is at the bottom of the Chasm, although has no easy way to get down. Thankfully, you know about the Light Creatures and with his help, you will be able to get one of them to head down rather than across the chasm. Use your Lantern with one of the creatures and choose to head 'Into the chasm'.
You will find yourself at the bottom of the chasm with some Skeletons and Skeletal Remains around. Search them and you will find a Silver Sickle(b), 6 Druid Pouches, a Spade, Hammer and Chisel. Use the Spade with the two rocks that have a Search option on them.
Under each rock will be a Brazier that you should use the Chisel on to get a Fire Orb and Earth Orb. Nearby there will be two Braziers that are still standing up. Use the Chisel on each of these to obtain a Water Orb and Air Orb.
Head south and there will be several skulls carved into the rock, each with a Recessed Block in. Next to the block is a symbol for one of the Elemental Runes, the rune also being named if you examine the block. Use the Orbs on the respective blocks to get the corresponding Elemental Key.
To get to the skull of water, you will need to climb up two walls that can be found between the lower skulls. Once you have all the keys, head back down to the lower skulls and enter the nose cavity.
You will find yourself within a tunnel that is only tall enough for you to crawl through, so make your way to the end of the tunnel and you will find a Lock. Examine it to see which Key needs to be used with it, then do the same with the other two lower skulls. You should now just have the Fire Key left, so head back up to the skull that you got the Water Key from and use the Fire Key with the Recessed block. Next to here will be a stone cube which you should search.
Upon searching the Stone Cube, the mouth of the skull behind you will open.
Temple of Guthix
Climb through the cave opening and follow the passage to find yourself in the main chamber of and Ancient Temple to Guthix.
Around the Temple will be Dead Vines, so stand on one of them and 'Cast Bloom' with the Silver Sickle so that a Vine Flower will grow upon it. Do this two more times until you have three Vine Flowers, the choose to Fill the Druid Pouches so you now have 9 of them.
From the main chamber are paths going in multiple directions, leading to a statue at the end that depicts a certain skill, once again being seen either by sight or examining the statue. Along the paths to the statues at Druid Spirits. Use a Druid Pouch with one of them and they will be released, dropping the ingredients for a Potion when they disappear.
Pick up the ingredients and you should notice that they are used to make a Potion for a certain skill that there is a statue for. Find the correct statue and use the Herb and 2nds with it to receive a Dolmen. For example, at the statue that depicts Ranging you should place the items used to make a Ranging Potion - Dwarf Weed and Wine of Zamorak. You can obtain ingredients for multiple statues at once, lowering the time it takes for you to make your way between statues.
In the main chamber is a Stone Table that you should use the Dolmen on.
Upon placing each Dolmen, you will see a large replica appearing on the large circle in front of you in a short cut-scene that makes your screen shake. Once all 8 Dolmen are in place, this circle will rise up and fit into the heavy door to the south, unlocking it and making it possible to head further into the temple.
The Stone of Jas
At this point, it is worth banking to prepare yourself for a fight with a level 454 Balance Elemental that uses all three different styles of attack, drains your stats and stops you at multiple points during the battle to taunt you, followed by two Demons that require you to have multiple forms of combat to attack with. When heading back down into the chasm, you will not need the Dagon'hai Robes, so can bank those and just take equipment to complete the battle and a Sapphire Lantern to get back down the chasm.
Although the Balance Elemental uses all three styles of combat, it is slow to change, making it possible to use Prayer to protect from the majority of its attacks, although if you are slow to change Prayer it can hit up to 30 damage, meaning it is worth having most of your inventory full of a reasonable food and a 1-click Teleport at hand. Because it will drain your stats, it is worth having at least one Super Restore Potion as well as a couple of Prayer Potions to keep your Prayer and combat stats topped up. So long as you keep your stats and Prayer topped up, experiencing no lag during the fight, it should be easy to kill - it has been slain using no Food or Potions.
After killing the Balance Elemental, two level 450 Demons will appear and use Prayer against you in a similar way to the Elite Black Knights, although the Prayer will not run out. This makes it necessary to have weapons for two combat styles to defeat them, although no other specific preparation is needed for them so long as you are ready for the Balance Elemental.
Once you have the equipment, head back to the Guthix Temple and head south to an open area with a glowing Mysterious Stone in the middle. Search the stone and confirm that you want to touch it, even if it is going to kill you, and out will come the Balance Elemental, forming from the glow.
Kill the Elemental, making sure you keep switching your Prayer, keeping it and the rest of your stats topped up.
Ranged Attack:
If using a Ranged attack, it will be wielding a Bow that initially appears next to its left side before being drawn. This will be the attack that the battle starts with.
Magic Attack:
When using a Magic attack, a glow will come from its head and blue spells will be fired at you.
Melee Attack:
When using a Melee attack, it will be wielding a Hammer in its right hand.
Once it is killed, you will see that the Mysterious Stone has gained a name and really is the Stone of Jas. Search it and a cut-scene will play.
You will notice that your Protection is growing in power, which actually means that all your combat stats other than Prayer are rising up to 255 by 4 levels a second.
Darve and Movario will appear and tell you that they discovered your ruse by talking to Lucien. He will explain how he wants to use it for research purposes, at which point Lucien will appear and explain to you his plans. The Stone of Jas will be teleported away and he will summon two level 450 Tormented Demons which you will have to slay using your two forms of combat.
To help you, several Guardians of Armadyl will appear and your stats should have been boosted to 255 during the conversation, leaving easy pickings. To help even more, your Hitpoints will keep healing to 255 during the fight so there is no need to worry about food since you'll have infinite Hitpoints.
Once you have slain the two Demons, talk to Idria who is next to where the Stone was and she will tell you to meet her in Falador. Sadly, your stats will be reduced to normal levels, so you'll be unable to go and do some normal monster killing with your Godly stats!
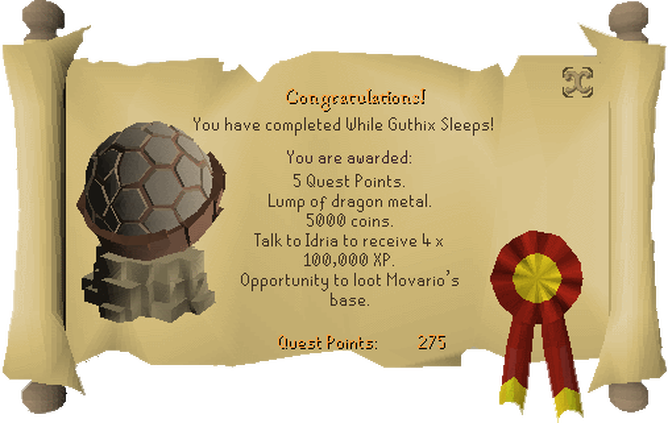
Head to Falador and talk to Idria, who will give you a piece of Ruined Dragon Armour that was dropped by the Demons. Quest Complete!
Head to Radimus Erkle in the Legends' Guild and talk to him.
He will explain that a lady from Taverley is organizing a mission to Karamja to set up a place of worship for the followers of Guthix. He will tell you to go and find Ivy Sophista in the long building opposite the Witch's House in Taverley. You will also be given a pass phrase that you should use when initially talking to her so that she knows who you were sent by.
Head to Ivy and talk to her. She will tell you that since there are Lucien's spies all over, you will need to talk to Thaerisk upstairs.
Thaerisk will explain that the Karamja trip is a cover story and there have been some horrible murders in Taverley. He organizes a group called 'Crux Eqal' which helps to fight evil - something that the elder druids are reluctant to do. They have information that Lucien has the Staff of Armadyl, the same object that gave Zamorak Godhood. Two level 38 Assassins will arrive, so you should kill them.
Talk to Thaerisk again once the assassins are killed and he will explain that the Temple Knights, Crux Eqal and the Guardians of Armadyl are recruiting to get more people to help fight evil. There have been lots of spies seen in Draynor Village recently, with a stranger, Movario, entering Lumbridge Caves at the same time as their arrival. Your task is to find out about Movario and collect proof of his research.
The Hunt for Movario
Head to Varrock Castle Library and speak to Reldo. He will tell you some information about Movario when questioned, letting you know that he has a Khazard accent and reads books about Traps, Housing Improvements and Divination, especially if they are very old. Asking where to find him, he will tell you to find a Jungle Tracking Expert who is more skilled than himself in the art of tracking. With some Logs, a Knife, 5000gp or a Ring of Charos(a), Elemental Runes and a Mind Rune, head to the Jungle Hunter area south of the Feldip Hills and speak to the Hunting Expert who you buy the skillcape from.
She will explain that the Broav has a good sense of smell and would be great for the job. It can be caught using a Deadfall trap in a special pit to the west, then baited with Mort Myre Fungi, which you will be given. Unlike normal Deadfall traps, you do not need to jump over it and the bait will be enough.
Set the trap with Logs and a Knife, then use the bait with it. A Broav should now come and fall into the trap, letting you dismantle the Collapsed Trap and get an Unconscious Broav. Take this back to the Hunting Expert and she will train it while you contemplate complex theological problems. To track successfully, you will need an item of Moravio's.
Head north to the Khazard Arena and into the building on the western side with the Launderer within. He is very concerned about losing money, so to get information from him, you will need to either give him 5000gp or charm him by wearing a Ring of Charos(a).
Upon giving him the money, you will obtain some Dirty Laundry that belongs to Movario. Drop the Broav and use the clothes on it. Repeatedly doing this, and following the direction in which it goes, while navigating around buildings or bridges which get in the way, will lead you to a building with a Crumbled Wall which can be climbed over. Once inside the building, the Broav will make its way to the Broken Table and sound excited, so it's something that you should search.
Movario's Base
Underneath the table is a trapdoor, so open it and climb inside, ensuring that your weight is over 0kg - if it isn't, certain doors within the base will not open. It is a multi-combat area with a number of level 95 Elite Khazard Guards, so follow the passage north until you reach some stairs that head down into an area that you are unable to teleport out of.
You will find a door that reads 'Further Access Prohibited' when searched that is the first of several traps. Looking at the text, see which letter in the message is the same as a symbol in the top row.
Symbols & Runes Symbol Rune Air Earth Mind Water Having seen which symbol is in the message, use the corresponding Rune on the door - if you get it wrong, you will be hit 25 damage. Having used the Rune on the door, choose to Search it before opening since failure to do so will hit 35 damage, summon 3 Guards and give you a poison that hits 6 damage. If you leave the base, this will reset and you will have to do it again.
Passing through the door, you will come to a room with Bookcases in and a Gate that will hit 33 damage if you attempt to open it. On the floor between the Bookcases are wires, one of which will be glowing - information that can be gathered by sight or examining the Floor Wires. Once you have discovered which wire is glowing, Search the Bookcase at one end of it. See where the glow moves to and Search the Bookcase at the other end. Doing this should yield a message saying 'CLICK!' to appear in our chatbox. If the glow goes from a central Bookcase to the fence, pull the lever in the Bookcase. Keep repeating this pulling of levers and getting 'CLICK!' messages at the end of the glow until all the wires light up.
The door should no longer be electrified, so pass through it and search the Staircase for traps before climbing up it. This room and the door leading into it will not have to be completed again having got this far.
Within the office that you reach, search the Desk to find Movario's Notes (volume 1). Next to the Desk is a Waste-paper basket which you should pick up and search. Do not try and take the Treasure since it is fake and you will get hit 50 damage if you do so.
Upon searching the basket, you will find a Ruby Key inside. One of the Bookcases on the western wall should be searched to discover a small hole with a red gem above before using the Ruby Key on it to make a set of stairs appear from the floor. Head up the stairs and Search the Bed to disable the trap.
This will unveil a Chest which you should use the Ruby Key on to unlock, keeping up the idea of searching everything. Looking inside, you will find Movario's Notes (volume 2), Strange Key Loop and Strange Key Teeth. Head back down the stairs and there will be a door that you could leave through.
Unfortunately, it is probably stuck if you try to open it. Head back down to the room with wires on the floor and search the painting on the east wall to move it. Climb into the newly revealed room and check the thermometer as well as the weight that you are carrying. Pick up weights from the pile that equal the difference between these numbers and head back upstairs. Use the weights on the statue with a book on its back and you should be able to exit through the door.
If you fail opening the door three times, you will go through the door, trigger a trap and find yourself in a prison cell having taken 15-20 damage from the trap. You will also have lost any items that you had picked up within the Base, so will have have to Picklock the cell to get out and make your way back to where you found the items. Once you are out of the teleport-free zone without having set off a trap, make your way back to Thaerisk with the Books you have collected.
Finding Lucien, One Step at a Time
He will explain that information needs to be gathered about Lucien's location so you should go and see the Guardians of Armadyl at the McGrubor's Wood entrance to their base, then return to him at the White Knight's Castle with information that you gather.
With some sort of weapon at hand, head north of McGrubor's Wood towards the building and you will walk into a cut-scene in which two level 88 Mercenary Axemen and a Mercenary Mage have taken it upon themselves to attack some poor Guardians of Armadyl who are around level 45. Help the Guardians kill the Mercenaries, then speak to the Wounded Guardian on the floor.
He will tell you to speak to Idria in the form of a riddle. Head to the Pub in Seers' Village (the Forester's Arms) and go upstairs to find Idria. She will explain how Lucien wants to do like Zamouregal attempted to do in Varrock, but to the whole of RuneScape and to get to him, you need to work your way up the food chain by capturing a spy in Draynor Village without anybody noticing.
Head to Sir Tiffy Cashien in Falador Park and tell him about what needs doing. He will refer you to Akrisae Kolluym in the White Knight's Castle near the cell and circular table on the ground floor. Talking to Akrisae will get you a Teleorb which you will need to plant on a spy in Draynor Village. If you ask him how to get there, he will offer a free Teleport.
Once in Draynor Village, find a Shady Stranger and use the Teleorb with them, then make your way back to Falador with 20gp and a Lantern Lens as well as either 28,875gp or a Snapdragon Seed.
Talk to Akrisae and there will be a cut-scene in which the Spy is teleported into the cage and a Druid comes into the cage with a Super Truth Serum to give. The Spy will punch the Druid who clumsily drops the Truth Serum, breaking it. As always, it will be your job to make a new one. Talk to Thaerisk and he will tell you how to make the Super Truth Serum.
If you do not have a Snapdragon Seed, you will be able to buy one from Thaerisk at this point as well as asking him for a Teleport to Port Sarim. Head to the Magic Shop and talk to Betty who will take the Seed and put it on the counter as well as giving you a normal Truth Serum and telling you that to enrich it you should filter light from the door onto it through a Rose Tinted Lens.
Buy some Pink Dye from her for 20gp and use it with the Lens to get a Rose Tinted Lens, then use it on the counter and direct the light from the door onto the Seed.
Search the counter and you will have an Enriched Snapdragon Seed. Head back to Falador and talk to Thaerisk who will tell you that the Seed needs growing in a special patch on the roof of the western tower of the castle. With a Seed Dibber, head up to the top of the tower and plant the Seed in the patch.
Recruitment and Information
Head back down and speak to Idria who will tell you that a group of elite individuals needs assembling to help try and stop Lucien, although little effort will be required. You will need to speak to:
- Turael - Slayer master in Burthorpe
- Hazelmere - Gnome on peninsular east of Yanille, Fairy Ring code CLS
- Duradel - Slayer master in Shilo Village
- Mazchna - Slayer master in Canifis
Use the Enriched Snapdragon with the Truth Serum to get a Super Truth Serum, then head into the cell with the Spy in. Use the Serum on the Spy and persuade them to drink it by choosing one of the options that is given to you, the correct answer varying from player to player - if you get it wrong, just try again. He will tell you that he works for Dark Squall, giving you a description of the looks.
Talk to Thaerisk and he will tell you that a portrait is needed. With some Charcoal and Papyrus, talk to the Spy again to get a Suspect Sketch.
Talk to Idria to give her the sketch to put up so that people can inform of sightings. She will also give you another four people who need recruiting.
- Ghommal - guard at the entrance to the Warrior's Guild
- Sloane - first floor of Warrior's Guild
- Harrallak - ground floor of Warrior's Guild
- Cyrisus - contact via the NPC Contact spell on Lunar Magic
Having recruited all of the required people, head to Akrisae who will explain how Silif had gone to scout the Black Knight's Fortress where Dark Squall was seen going in. It is suspected that Silif followed, so you need to go and have a look.
With an Unpowered Orb, Charge Orb Spells, Bronze Med Helm, Iron Chainbody, weapons for two combat styles, some normal armor and possibly a Prayer Potion, head to the Black Knights Fortress. Enter the Fortress and pass through the wall opposite the entrance. Climb down the ladder and you will find a room with a Tile in the floor that you should cast the Orb charging spell on.
This will turn the Tile into a Trapdoor that you can pass through to enter a multi-combat tunnel full of high level aggressive monsters. Head north, then follow the path east until you reach an area with just one level 138 Elite Black Knight. It will use Prayer against the attack that you are using, switching to the correct one after you have made several attacks. After 50 seconds, its Prayer will run out so it is possible to kill even if you only brought weapons to attack in one combat style.
Kill it three times to obtain Elite Black Platelegs, Platebody and Full Helm. Equip it and other monsters within the dungeon will stop attacking you. If you die and lose the Armour, you will be unable to reobtain it via the listed methods and will need to buy it from another player. Head west and jump over the Broken Bridge, making your way north and following the eastern fork when the path splits. Climb up the wall and keep following the path north round a set of Barricades until it heads east to a group of cells, one of which contains Silif.
Talk to Silif and he will say he feels weak. Head back west the way you came until the path splits several ways with a number of Doors. Wearing your Elite Black Armour, head through the northern door. Search the Desks, Wardrobes and the Key rack on the northern wall to get some more Elite Black Armour, Dagon'hai Robes, a Lobster, a Restore Potion (4), a Strange Teleorb and a Cell Key - all items that you will need. In the eastern part of the room is Dark Squall, who should be spied on so you can overhear a conversation he has.
Head back to Silif and open the Cell with the Key. Use the Food and Restore Potion on him to give him energy, then the Elite Black Armour to make him blend in as you have managed to. Talk to him and he will explain how you need to infiltrate the base (you cannot have a familiar Summoned since it would make you stand out too much!). Head out of the cage and back to Dark Squall's room with Silif following. Stand next to the maps on the south wall and talk to him to be given a Teleorb that needs to be put on Dark Squall while he studies the maps, then to head back to Falador.
Make your way across the room and use the Teleorb with Dark Squall, only to get noticed doing so.
He will reveal that he is actually Surok Magis before getting all the guards in the room to attack you, so it is worth making a fairly quick Teleport out to Falador.
Hazelmere's Prophecy
With a Law and Death Rune as well as the Dagon'hai Robes and Strange Teleorb, talk to Akrisae who will explain that the heroes are on the western edge of the Wilderness to find Lucien's base. Making sure you have the needed items - Runes, Robes and Strange Teleorb - enter the cage and say that you are ready and you will be switched with Surok and Teleported back to his hideout, while he gets locked in the cage (which has a Teleblock on to stop him escaping).
Climb up the nearby ladder and stand in the middle of the room, which has a Death and Law Rune on the wall. Activate the Strange Teleorb and you will find yourself in an icy location which is clearly related to Lucien. Head north up the eastern path and climb up the ice wall before jumping to the Ledge on the roof of the Chapel. Run east to the other side of the building and an exciting cut-scene will play.
Lucien will summon a number of creatures in a 'recruiting event' before the eight heroes, all of which are level 197, Teleport in.
A rather one-sided battle will ensue, with all the heroes fighting bravely, with losses occurring as Lucien turns them into smoke one by one. Thankfully, there are survivors who manage to escape.
Lucien will notice you are there and set the Guards on you. Make your way back to the ice area so that you are out of the Wilderness and can teleport away back to Falador.
Chasm of Tears
Talk to Idria and she will inform you that the bravery of the lost warriors will be remembered and statues have been put round the lake in Falador Park in memory of them. During this time, Movario has moved into Lumbridge Caves looking for the Fist of Guthix, so it's your job to go to him and pretend you are Surok.
Switch the Lens in a Bullseye Lantern to get a Sapphire Lantern, light it and head towards the Tears of Guthix Mini-Game while wearing the Dagon'hai Robes. Talk to Movario, saying that you are Surok and were sent by Lucien. He will tell you that he thinks the Stone of Jas is at the bottom of the Chasm, although has no easy way to get down. Thankfully, you know about the Light Creatures and with his help, you will be able to get one of them to head down rather than across the chasm. Use your Lantern with one of the creatures and choose to head 'Into the chasm'.
You will find yourself at the bottom of the chasm with some Skeletons and Skeletal Remains around. Search them and you will find a Silver Sickle(b), 6 Druid Pouches, a Spade, Hammer and Chisel. Use the Spade with the two rocks that have a Search option on them.
Under each rock will be a Brazier that you should use the Chisel on to get a Fire Orb and Earth Orb. Nearby there will be two Braziers that are still standing up. Use the Chisel on each of these to obtain a Water Orb and Air Orb.
Head south and there will be several skulls carved into the rock, each with a Recessed Block in. Next to the block is a symbol for one of the Elemental Runes, the rune also being named if you examine the block. Use the Orbs on the respective blocks to get the corresponding Elemental Key.
To get to the skull of water, you will need to climb up two walls that can be found between the lower skulls. Once you have all the keys, head back down to the lower skulls and enter the nose cavity.
You will find yourself within a tunnel that is only tall enough for you to crawl through, so make your way to the end of the tunnel and you will find a Lock. Examine it to see which Key needs to be used with it, then do the same with the other two lower skulls. You should now just have the Fire Key left, so head back up to the skull that you got the Water Key from and use the Fire Key with the Recessed block. Next to here will be a stone cube which you should search.
Upon searching the Stone Cube, the mouth of the skull behind you will open.
Temple of Guthix
Climb through the cave opening and follow the passage to find yourself in the main chamber of and Ancient Temple to Guthix.
Around the Temple will be Dead Vines, so stand on one of them and 'Cast Bloom' with the Silver Sickle so that a Vine Flower will grow upon it. Do this two more times until you have three Vine Flowers, the choose to Fill the Druid Pouches so you now have 9 of them.
From the main chamber are paths going in multiple directions, leading to a statue at the end that depicts a certain skill, once again being seen either by sight or examining the statue. Along the paths to the statues at Druid Spirits. Use a Druid Pouch with one of them and they will be released, dropping the ingredients for a Potion when they disappear.
Pick up the ingredients and you should notice that they are used to make a Potion for a certain skill that there is a statue for. Find the correct statue and use the Herb and 2nds with it to receive a Dolmen. For example, at the statue that depicts Ranging you should place the items used to make a Ranging Potion - Dwarf Weed and Wine of Zamorak. You can obtain ingredients for multiple statues at once, lowering the time it takes for you to make your way between statues.
In the main chamber is a Stone Table that you should use the Dolmen on.
Upon placing each Dolmen, you will see a large replica appearing on the large circle in front of you in a short cut-scene that makes your screen shake. Once all 8 Dolmen are in place, this circle will rise up and fit into the heavy door to the south, unlocking it and making it possible to head further into the temple.
The Stone of Jas
At this point, it is worth banking to prepare yourself for a fight with a level 454 Balance Elemental that uses all three different styles of attack, drains your stats and stops you at multiple points during the battle to taunt you, followed by two Demons that require you to have multiple forms of combat to attack with. When heading back down into the chasm, you will not need the Dagon'hai Robes, so can bank those and just take equipment to complete the battle and a Sapphire Lantern to get back down the chasm.
Although the Balance Elemental uses all three styles of combat, it is slow to change, making it possible to use Prayer to protect from the majority of its attacks, although if you are slow to change Prayer it can hit up to 30 damage, meaning it is worth having most of your inventory full of a reasonable food and a 1-click Teleport at hand. Because it will drain your stats, it is worth having at least one Super Restore Potion as well as a couple of Prayer Potions to keep your Prayer and combat stats topped up. So long as you keep your stats and Prayer topped up, experiencing no lag during the fight, it should be easy to kill - it has been slain using no Food or Potions.
After killing the Balance Elemental, two level 450 Demons will appear and use Prayer against you in a similar way to the Elite Black Knights, although the Prayer will not run out. This makes it necessary to have weapons for two combat styles to defeat them, although no other specific preparation is needed for them so long as you are ready for the Balance Elemental.
Once you have the equipment, head back to the Guthix Temple and head south to an open area with a glowing Mysterious Stone in the middle. Search the stone and confirm that you want to touch it, even if it is going to kill you, and out will come the Balance Elemental, forming from the glow.
Kill the Elemental, making sure you keep switching your Prayer, keeping it and the rest of your stats topped up.
Ranged Attack:
If using a Ranged attack, it will be wielding a Bow that initially appears next to its left side before being drawn. This will be the attack that the battle starts with.
Magic Attack:
When using a Magic attack, a glow will come from its head and blue spells will be fired at you.
Melee Attack:
When using a Melee attack, it will be wielding a Hammer in its right hand.
Once it is killed, you will see that the Mysterious Stone has gained a name and really is the Stone of Jas. Search it and a cut-scene will play.
You will notice that your Protection is growing in power, which actually means that all your combat stats other than Prayer are rising up to 255 by 4 levels a second.
Darve and Movario will appear and tell you that they discovered your ruse by talking to Lucien. He will explain how he wants to use it for research purposes, at which point Lucien will appear and explain to you his plans. The Stone of Jas will be teleported away and he will summon two level 450 Tormented Demons which you will have to slay using your two forms of combat.
To help you, several Guardians of Armadyl will appear and your stats should have been boosted to 255 during the conversation, leaving easy pickings. To help even more, your Hitpoints will keep healing to 255 during the fight so there is no need to worry about food since you'll have infinite Hitpoints.
Once you have slain the two Demons, talk to Idria who is next to where the Stone was and she will tell you to meet her in Falador. Sadly, your stats will be reduced to normal levels, so you'll be unable to go and do some normal monster killing with your Godly stats!
Head to Falador and talk to Idria, who will give you a piece of Ruined Dragon Armour that was dropped by the Demons. Quest Complete!
